
Plicker Magnets
PLICKER MAGNETS
|
Special thanks to Chris Corso for his work on the set of 63 below...
Please note: If you open up this file it is best to use the Safari browser. Also, wait several seconds for it to open.
Please note: If you open up this file it is best to use the Safari browser. Also, wait several seconds for it to open.
|
As most of you who come to my site can attest to, I love Plickers. I've been using them for over 4 years now in my Phys. Ed. classes. When Plicker Magnets came along I loved the idea. The ability to scan all the magnets in less than 5 seconds really appealed to me. But there were two things that didn't sit well with me.
First, I didn't like how all of the versions created allowed others in the class to see the answer of other students. Even if it was only a student number that could be used to identify a student, that was too much info for me. Second, I didn't like how most of the boards that the magnets were being used on had students moving their magnets from left to right as if the end goal was always to get to the right side first. Let's be honest, kids race and try to be first. In addition, I saw picture on Twitter of a board where there were a few students at the far right of the board placing their magnets while a sad looking student was standing to the far left where only a few magnets were remaining. Not what I want in my classes.
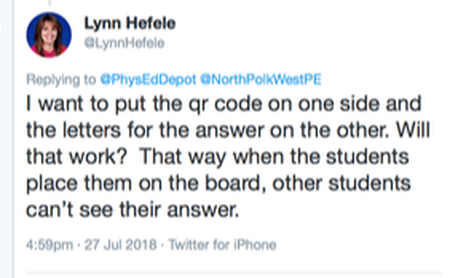
With those two obstacles, I had no reason to create some of my own. I used the cards and that was fine with me. Then I saw this tweet from Lynn Hefele...
First, I didn't like how all of the versions created allowed others in the class to see the answer of other students. Even if it was only a student number that could be used to identify a student, that was too much info for me. Second, I didn't like how most of the boards that the magnets were being used on had students moving their magnets from left to right as if the end goal was always to get to the right side first. Let's be honest, kids race and try to be first. In addition, I saw picture on Twitter of a board where there were a few students at the far right of the board placing their magnets while a sad looking student was standing to the far left where only a few magnets were remaining. Not what I want in my classes.
With those two obstacles, I had no reason to create some of my own. I used the cards and that was fine with me. Then I saw this tweet from Lynn Hefele...
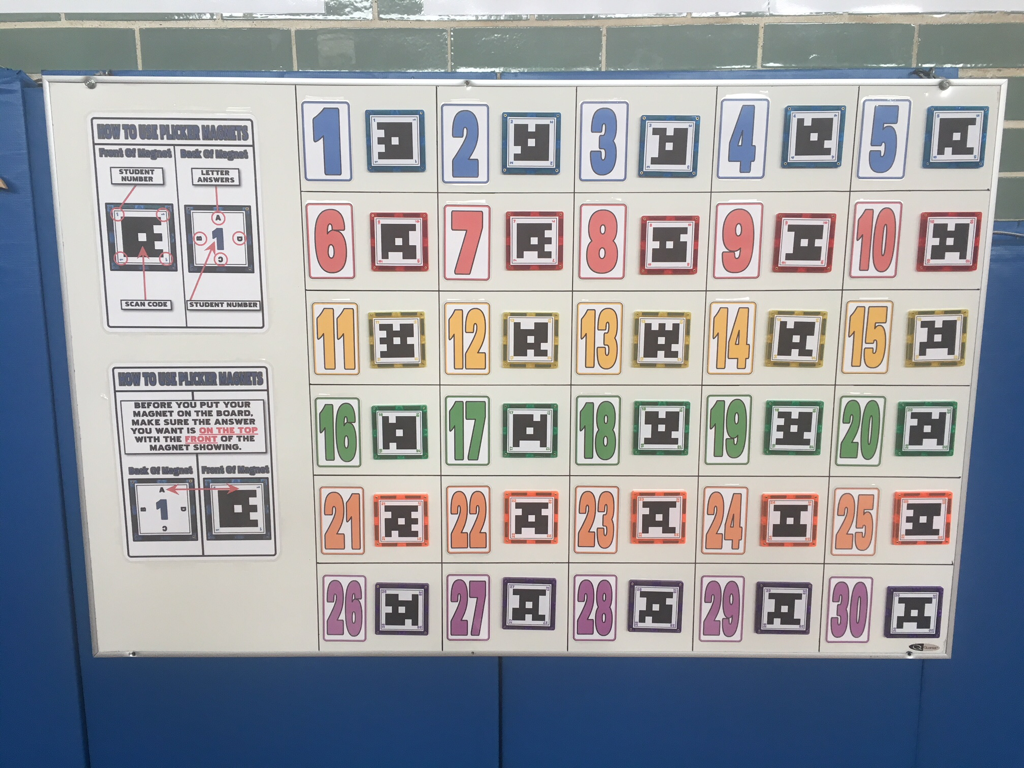
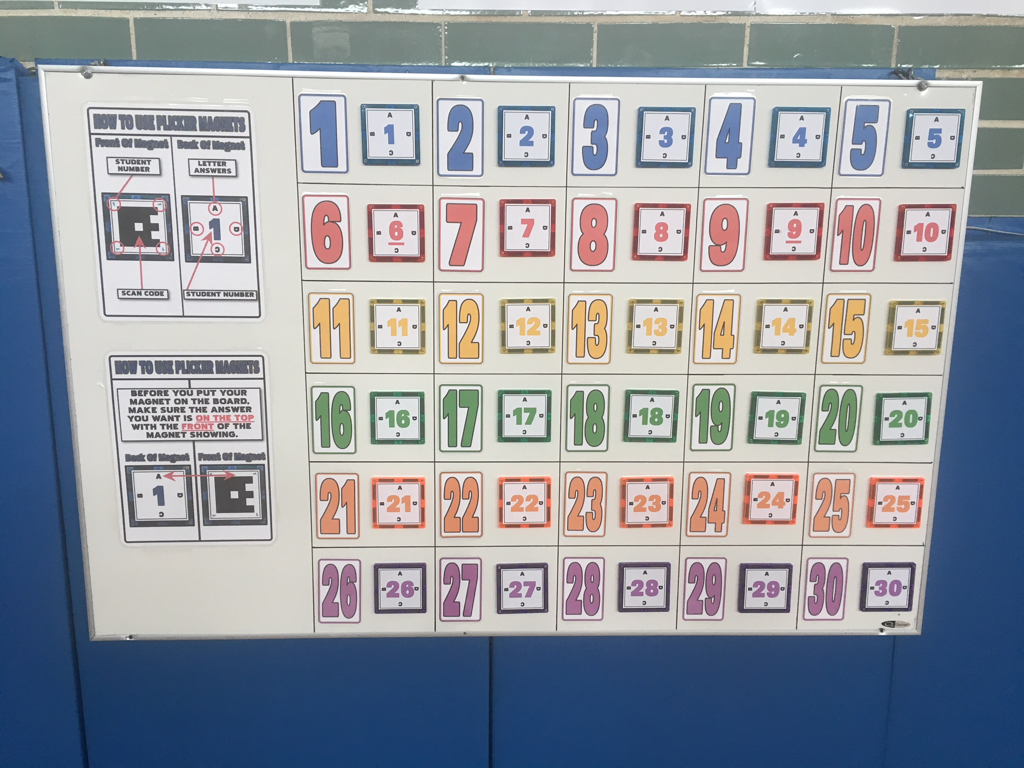
THAT was the answer. Also, when students progress from one level to another, instead of moving their magnet across the board, they simply rotate it in the same space on the board. To that end I started creating my own. Below you will see what I created. After posting this version I've had several teachers tell me they like this better for the reasons I outlined above. Feel free to use any and all of the info for your classes. Plick-on!!!
|
|
|
|
How I Made Them...
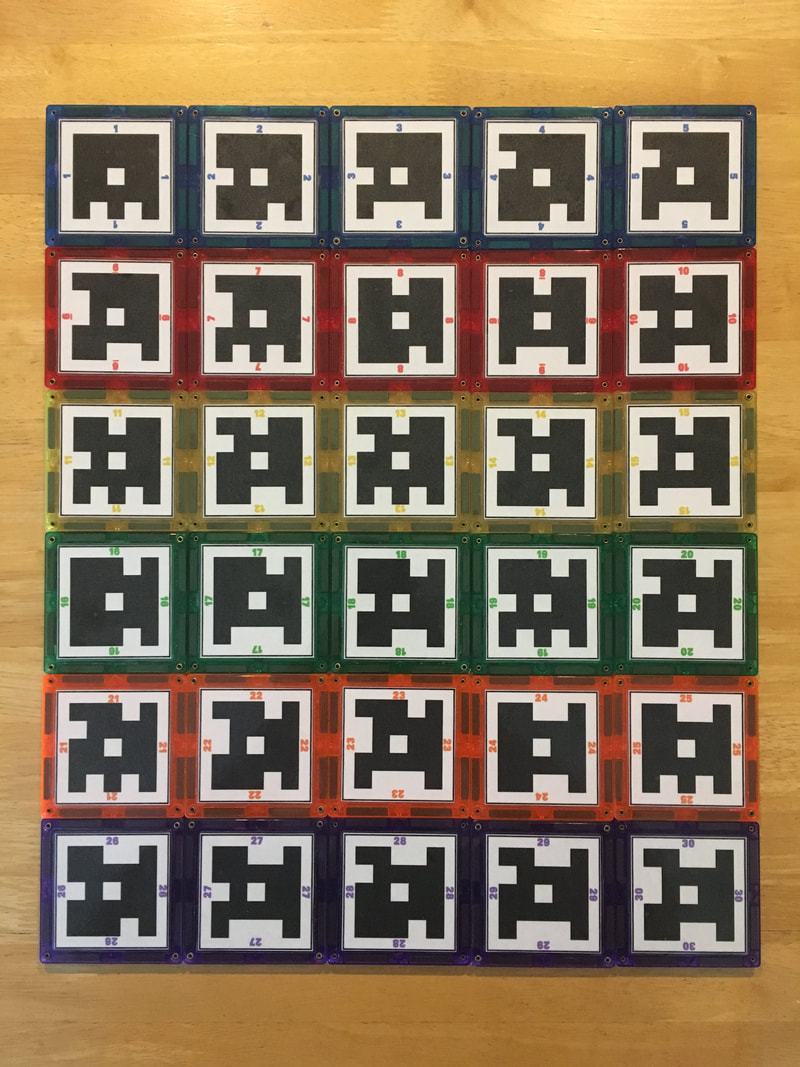
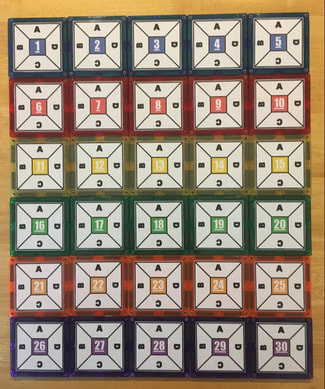
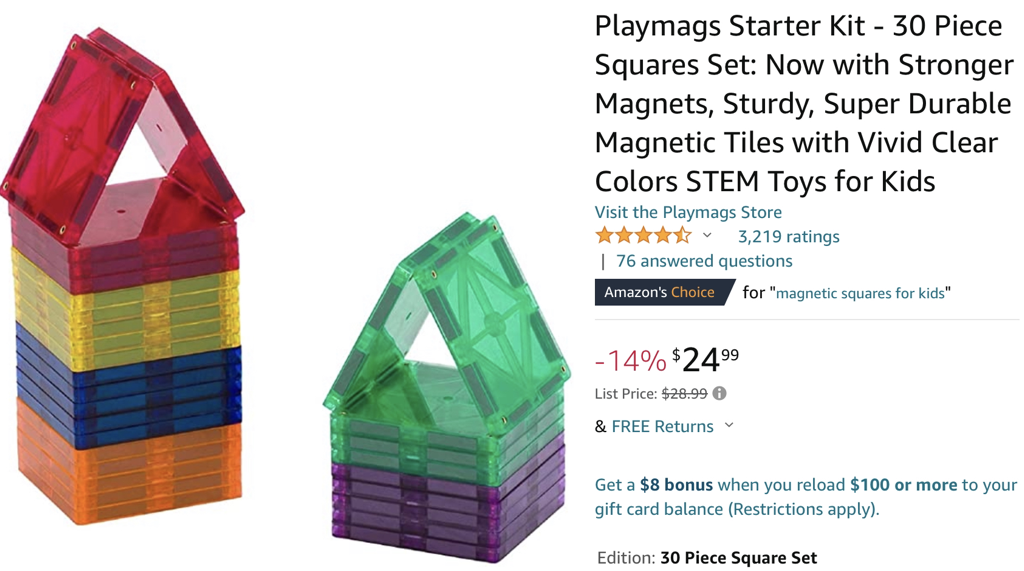
First off, I purchased the following magnets off Amazon. There are others out there but I wanted the 6 color because I have my students in 6 color groups...
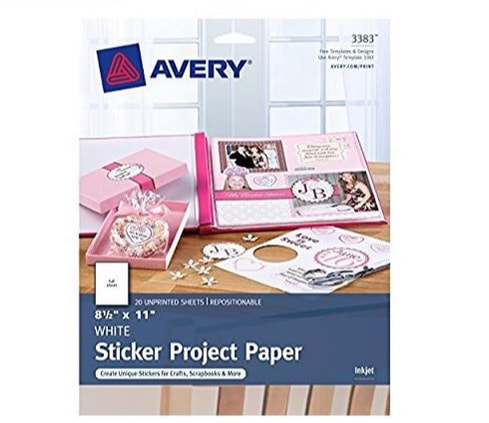
Next, I purchased the following full sheet sticker paper from Amazon...
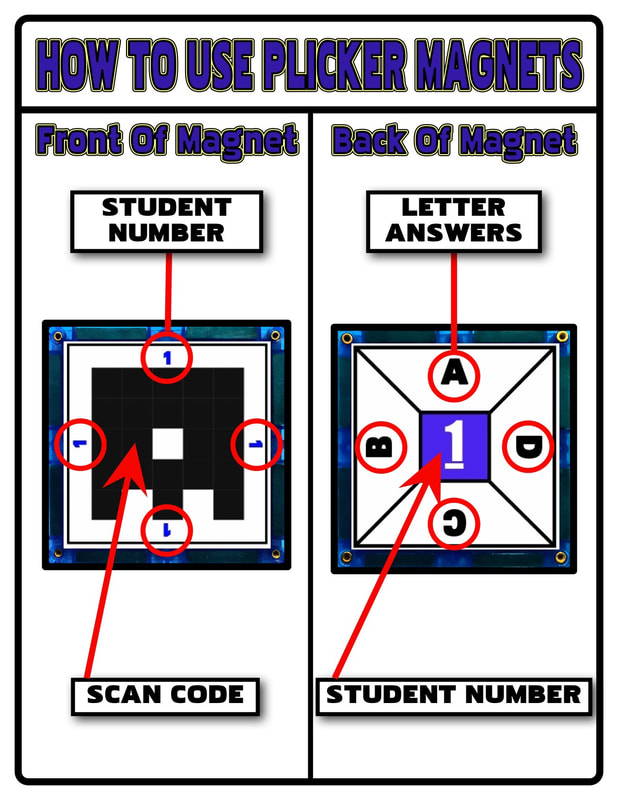
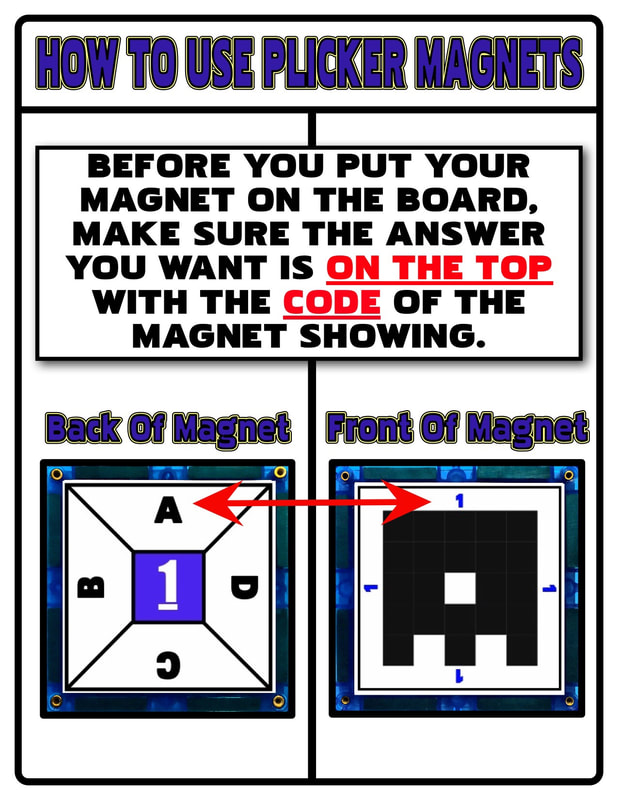
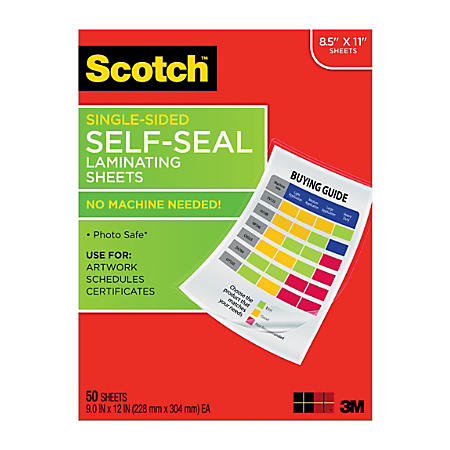
Finally, after printing them out, cutting just outside the black line and sticking them to the magnets (Make sure the letters on the back match up with the code on the front!!!), I put a thin protective self sealing laminate on the front and back that was cut slightly larger to cover the code sticker.
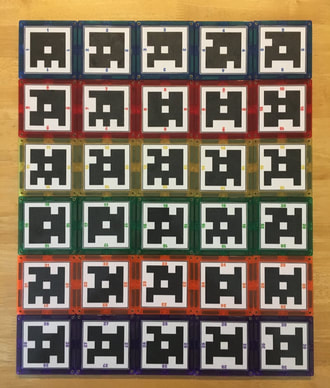
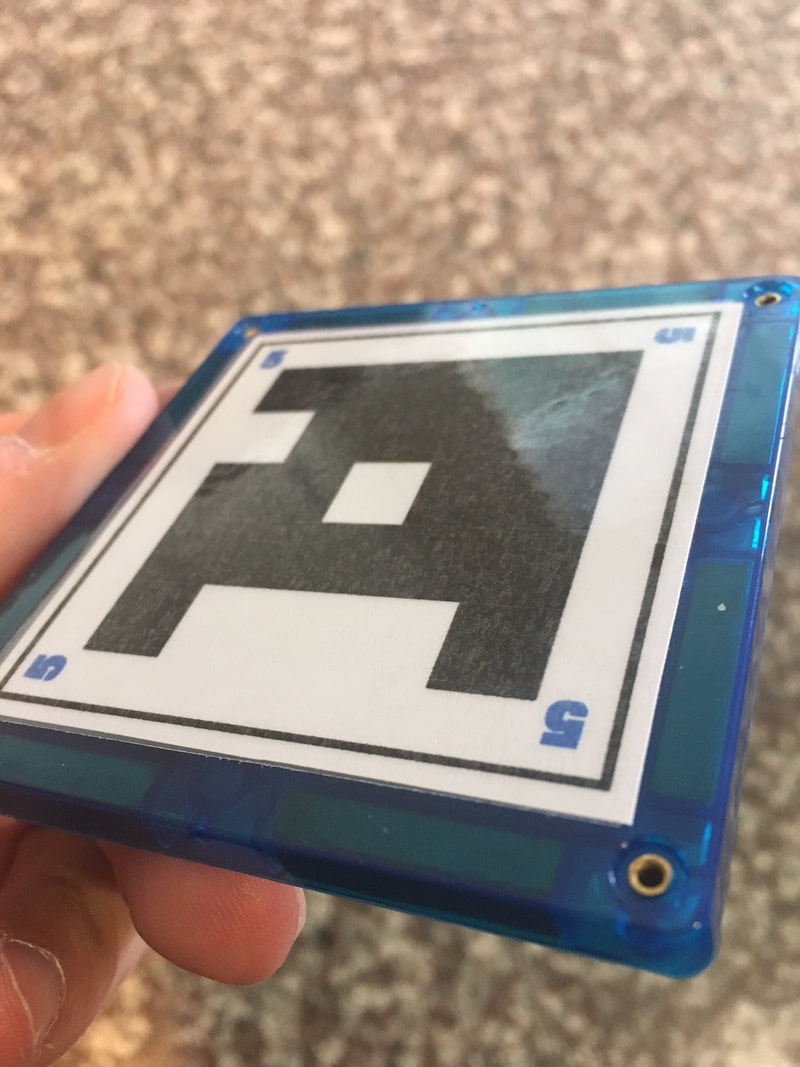
The final results...
|

|
You can see a slight shine to them but they all scanned with no issues.